So remember the MacBook Air I bought? And how I mentioned something happened to the NetBook? Well…
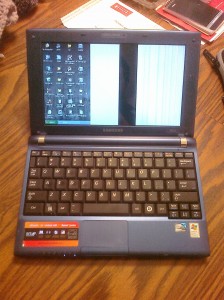
That’s what I was talking about. My sister took it with her to a family reunion in Sweden, where my cousins would break the screen while playing around. Â Not a big deal, so I made my sister a deal. Â If she would help me replace the Netbook, I would attempt to repair the screen. If I could, it’s hers. If not, she can use the replacement I buy until she can afford her own.
Details of the repair follow:
Before I ordered a replacement screen, I wanted to open up the Netbook and see if anything was visibly wrong inside. Â I would’ve taken far more pictures of this process, but I didn’t have a camera with a macro lens at the time.
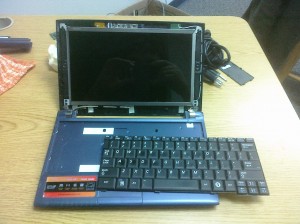
For anyone who needs to teardown a Samsung N120 – you can’t get to the motherboard through the keyboard as you can in some laptops. I don’t see this as a bad thing. Â It’s almost solid plastic under the keyboard, so if a liquid were to spill on it you could realistically save the Netbook before the liquid does any real damage.
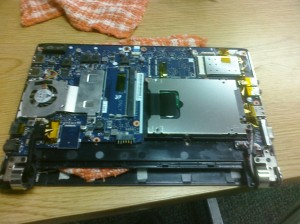
To get to the motherboard, you have to unscrew everything on the bottom and gently open tabs all along the edges of the casing. Â Gentle pressure with a Flathead screwdriver will do it, you just need to place it between the two edges, and twist to force it open. Â This includes going all the way to the back hinges. Â Once you’re done, pressing them back together will cause them to pop back into place. Â In the picture of the separated keyboard above, I had opened most of it but thought I was missing something to open the hinges – they were pressed together so tightly that at first I thought it was a molding line. Â But if you have plenty of patience with it they’ll eventually pop open and you can open the casing all the way through the battery compartment, and get the motherboard out.
So with this I was able to verify that the connections to the screen and to the motherboard were intact and functioning normally. Â This means the screen definitely needed to be replaced, which was fortunate because that was the easiest component to find online.
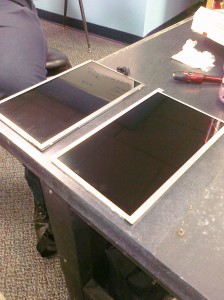
So, once the screen arrived I removed the old screen. Just a matter of removing screws. Â The Bezel pops off in a similar fashion to the body casing. Â Once the bezel is off it’s just removing a few screws to take off the screen.
The biggest problem in documenting this process is the lack of a real camera to take pictures with. Pictures of the screen frame and connectors just wouldn’t come out, so I don’t have them to show you. Â That said, when you’re removing the screen make note of the frame holding it in. Â The frame needs to be in that same position to attach the new screen. Â If you didn’t pay attention don’t sweat it. You want the “tabs” on the frame to be flush with the front of the screen. Which would make the screen “sink in” to the screen base. Â And even if you don’t read that you’ll know something is wrong fairly quickly if you have them on in the wrong direction.
What I can’t really show you is how the ribbon cable to get the screen on works. Â Just be gentle with it. Â Also, the best angle to work with it is from the top of the screen. Â For example, imagine the netbook facing away with you, with the screen tilted back fully. Â At this angle you can tilt the new LCD forward, and slide the connector in. Trying to do this any other way is cumbersome at best.
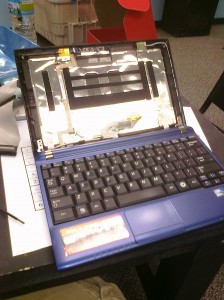
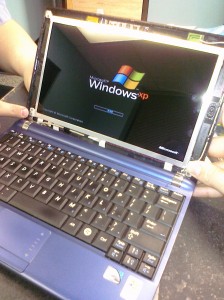
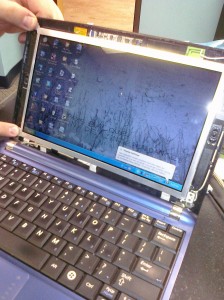
Once I had the screen installed and connected, it was time to test it:
In these pictures you can sort of see the frame I was talking about on the left and right.
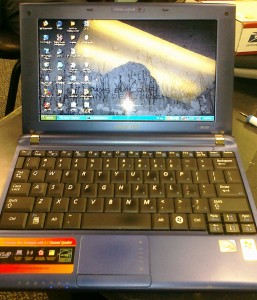
Then once I had tested it, everything just had to be screwed back in, and the Bezel had to popped back on. Â Then it was as good as new!
Looks great doesn’t it? Â This was my first time doing a screen replacement. Â I was really surprised by how easy it was. Â Even on a smaller form factor like this. Â And my sister was absolutely thrilled with her “new” working Netbook!
Thanks for reading!
Great description. Thanks. I’m going to perform the same action!
Thank you so much for these instructions! I have to say, if it wasn’t for this page and the cheap replacement screen I found from Amazon (83€), my Samsung n120 would have probably ended at trash-can. But now, I just just installed the new screen and it works like a charm! 🙂